My Profile
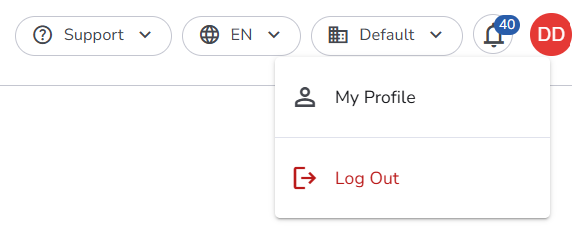
In OpenCDMP, you can view and edit your profile. Click your profile picture in the top navigation bar and choose My Profile (the same menu offers Log Out).
The page opens with a header that shows your picture, your name, your primary email address and, once you have set them, your organisation and your role. Below it, a menu on the left leads to the page's tabs:
| Tab | What it covers |
|---|---|
| Profile | Your personal details and the email addresses you sign in with |
| Language & region | The language of the application and how dates and numbers are written |
| Notifications | Which channel each notification reaches you through first |
| Repository accounts | Your own credentials for repositories and other plugins. Shown only when a plugin asks users for settings |
Save your changes
All tabs share one save bar at the bottom of the page. While something is unsaved, the bar shows how many places changed, with Save changes and Discard. If a required field is empty, saving waits and the message Some settings need attention before they can be saved. appears. Leaving the page with unsaved changes asks for confirmation first.
Linking and unlinking email addresses are the exception: they are confirmed by email and do not wait for Save changes.
To switch to another organisation you have access to, use the organisation button in the top navigation bar (see Switch organisation).
After you log in, OpenCDMP returns you to the page you were on when you started signing in.
Profile
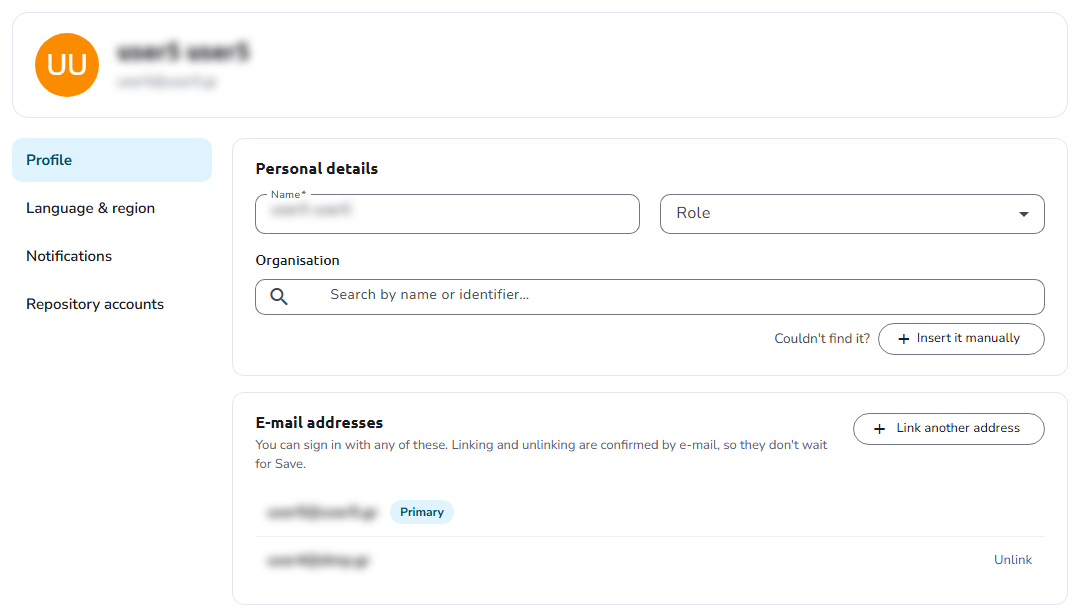
Personal details
- Name: required.
- Role: the role that best describes you, for example
ResearcherorLibrarian. - Organisation: the organisation you belong to, searched from the organisation references. If it is not listed, add it with Insert it manually (see Adding a reference manually).
E-mail addresses
The email addresses you can sign in with. The first one is marked Primary. An address added through an external sign-in provider shows that provider's icon.
Link account
If you have more than one user account in OpenCDMP, you can merge them into one. OpenCDMP links existing accounts based on their email. The merge transfers all data from the secondary accounts to the primary user account. The primary account is the one from which the request is submitted.
To link another account, click Link another address in the E-mail addresses card. The Link new account dialog asks for the email of the other account; enter it and click Add. A Verify linked account message confirms that a confirmation email has been sent.

Linking an account is completed only after the email is confirmed.
Unlink account
If more than one email is connected to your account, you can unlink the ones that are not primary. Unlinking an email removes its sign-in credentials without affecting your data or other linked emails, so a new account can later be created for this email.
To unlink an address, click Unlink next to it, read the explanation, and click Confirm. A Verify account to be unlinked message confirms that a confirmation email has been sent to your main account. The link in that email takes you back to the platform, where the Unlink Your Account page asks for a final Confirm.

Unlinking an account is completed only after the email is confirmed.
Language & region
The language of menus and emails, and how dates, times, and numbers are written:
- Language
- Time Zone
- Format: how dates and numbers are written. Examples below the fields show the result (Dates look like and Numbers look like).
Your organisation sets the defaults that new users start with. See Language & region in the organisation settings.
While you are signed in, choosing a language from the language selector in the top navigation bar also saves it to your profile, so later visits and emails use it too.
Notifications
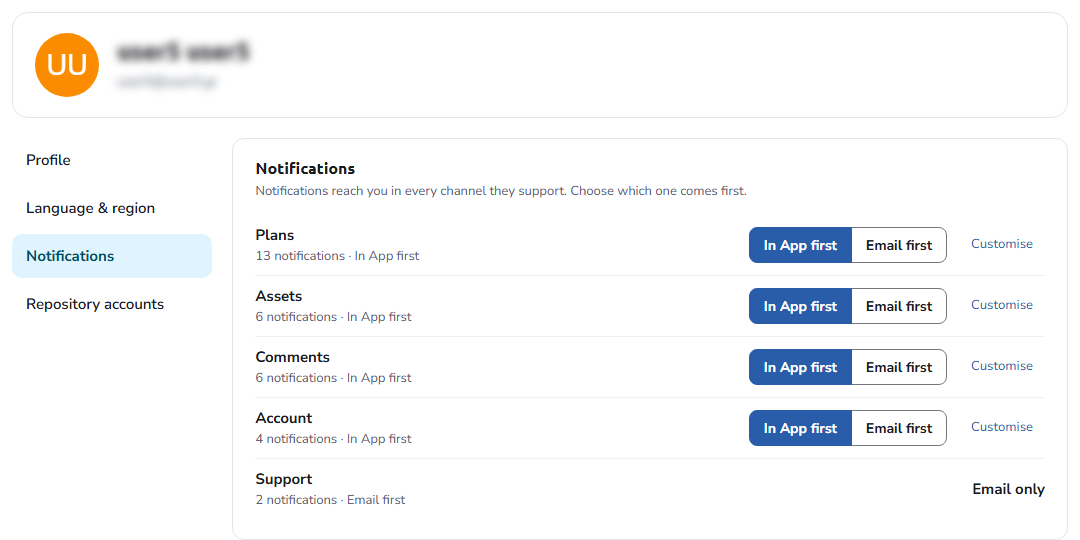
Each notification is sent through its first channel, such as Email or In App, and the next channel is used if that one fails. This tab sets which channel comes first; it does not turn channels off.
Notifications are grouped by topic (Plans, Assets, Comments, Account, Support). Each group shows how many notifications it holds and which channel comes first, for example 6 notifications · Email first. When the notifications of a group use different first channels, the group reads set one by one.
- To set the first channel for the whole group, click one of its buttons, for example Email first or In App first.
- To set it per notification, click Customise, choose the channel for each notification, and click Done.
- A group or notification that supports a single channel shows that channel as only, for example Email only.
Your organisation decides which channels each notification may use. See Notifications in the organisation settings, and the notification service section for more about the channels.
Repository accounts
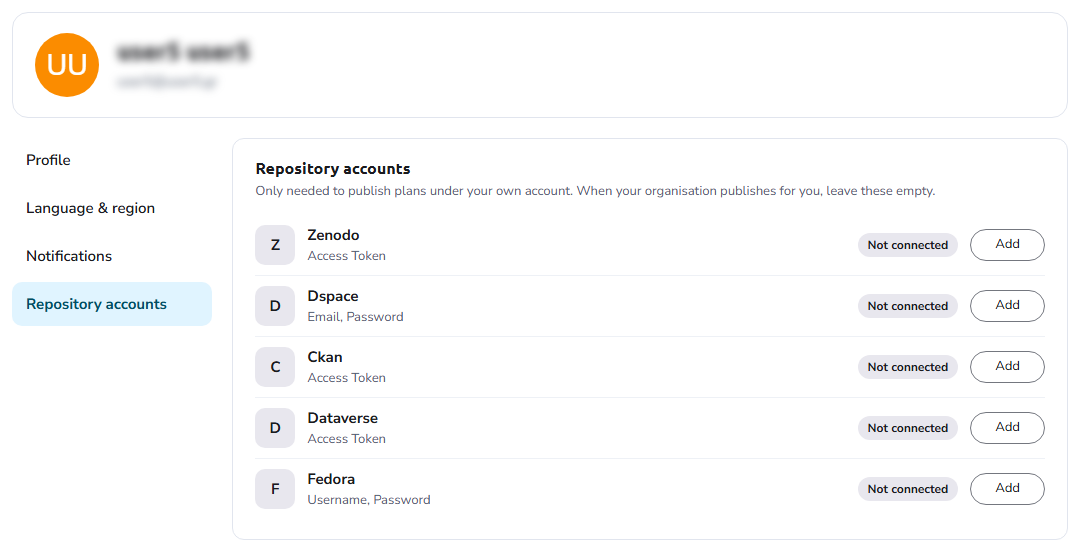
Your own credentials for the repositories you publish plans to, and the settings of any other plugin that asks users for them. The tab appears only when at least one plugin asks for such settings.
These credentials are needed only to publish plans under your own account. When your organisation publishes for you, leave them empty.
Each repository is listed with the fields it asks for, for example an Access Token (Zenodo, CKAN, Dataverse) or a username or email and a password (DSpace, Fedora), and a status:
- Not connected: nothing is saved. Click Add, fill in the fields, and save.
- Connected: your credentials are saved. Click Replace to enter new ones, or Remove to delete them.
- Saved when you save / Removed when you save: a change waiting for Save changes. Undo cancels a removal, and Cancel an edit.
Credentials are stored encrypted. They are never shown again after you save.
You can also save credentials while publishing: in the Publish to dialog, enter them under your own account and keep Save to my profile for next time ticked.
Guided tours
Short guided tours introduce the redesigned pages the first time you open them. Which tours you have already seen is saved with your account. See Guided tours for the pages that have one and how to replay them.