Your first plan
This tutorial takes you from logging in to a finished Data Management Plan (DMP) or Software Management Plan (SMP): you pick a blueprint, answer its questions, describe your research outputs as assets, invite your team, finalize the plan, and download or publish it. Each step links to the page that covers it in full.
Plan on 15 to 30 minutes, and have the basic facts of your project at hand: its title, funder and grant, the people and organisations involved, and the outputs it will produce. A few habits make for a better plan:
- Start early, and update the plan at key milestones: it is a living document.
- Be specific: say where data is stored and how it is backed up, not only that it is "stored securely".
- Think beyond the project: who can reuse the outputs, under which license, and for how long they are kept.
- Involve your team, and ask your library, IT, or data steward when you are unsure about storage or preservation.
Your organisation must have set up at least one blueprint and one asset template. If no blueprint appears when you create a plan, or no template when you add an asset, contact your OpenCDMP administrator. See Blueprints and asset templates for what they are.
Step 1: log in
Open your OpenCDMP address, click Log in, and sign in with your account or your institution's sign-in. The Dashboard opens. The first time you open a redesigned page, a short guided tour shows what is where; follow it with Next or Skip it.
Step 2: start a plan and choose a blueprint
Click New Plan under My Plans in the side navigation menu. On the Select Blueprint step, pick the blueprint that matches your funder or project; selecting one shows a preview of its sections and questions on the right. The default one is usually a good start. If the blueprint asks for your consent, tick the box, then click Proceed with this blueprint.
Already have a plan in another tool? Click Import Plan instead (see Import a plan).
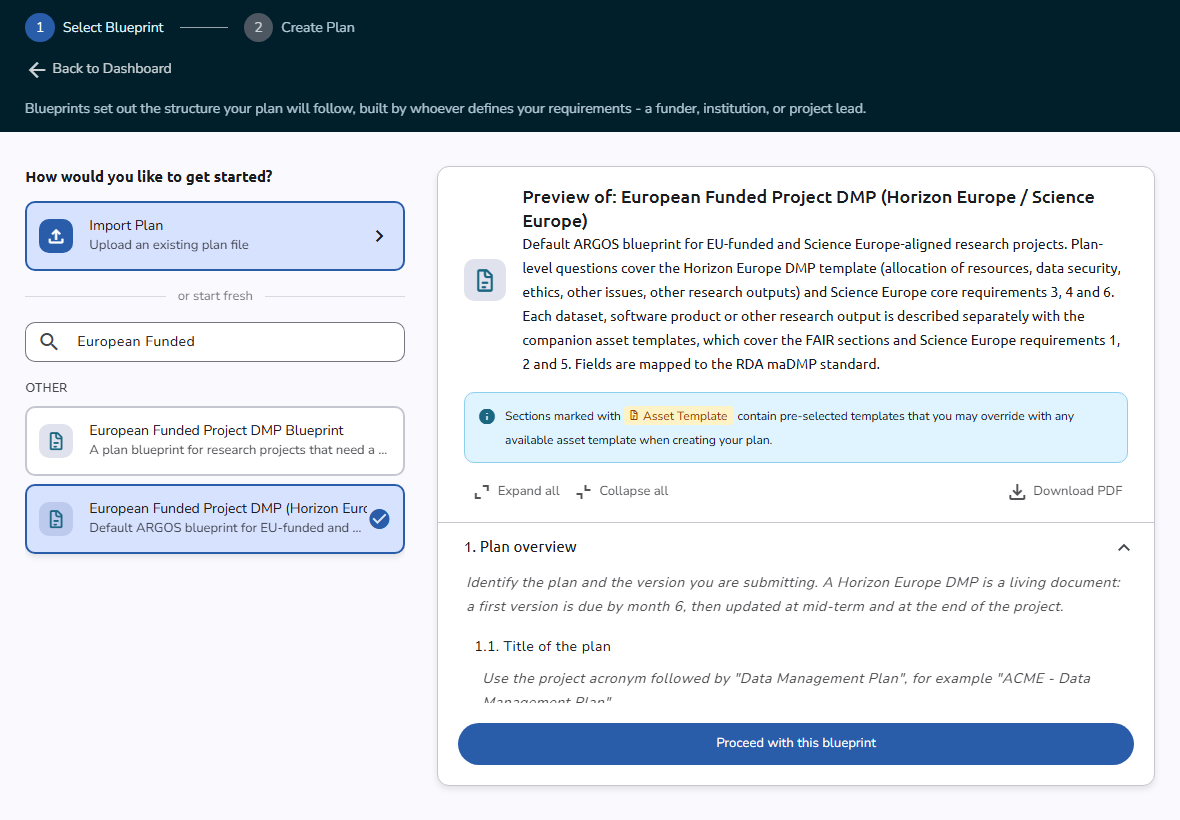 Choosing a blueprint
See Create or edit a plan for the details, including Creation Consent.
Step 3: answer the plan questions
The plan editor opens, with the sections of your blueprint in the table of contents on the left and the plan actions in the toolbar at the top. Work through the sections: the plan's title, description, and language, then whatever your blueprint asks, such as contacts, funding, researchers and organisations, licenses, and the plan's Access. Funders, grants, people, and organisations are references: search for them, or add them with Insert it manually when they are not listed.
Questions marked with an asterisk are required, and the Required fields counter in the table of contents tracks what is left. Click Save whenever you like: saving needs only the title, so you can come back later.
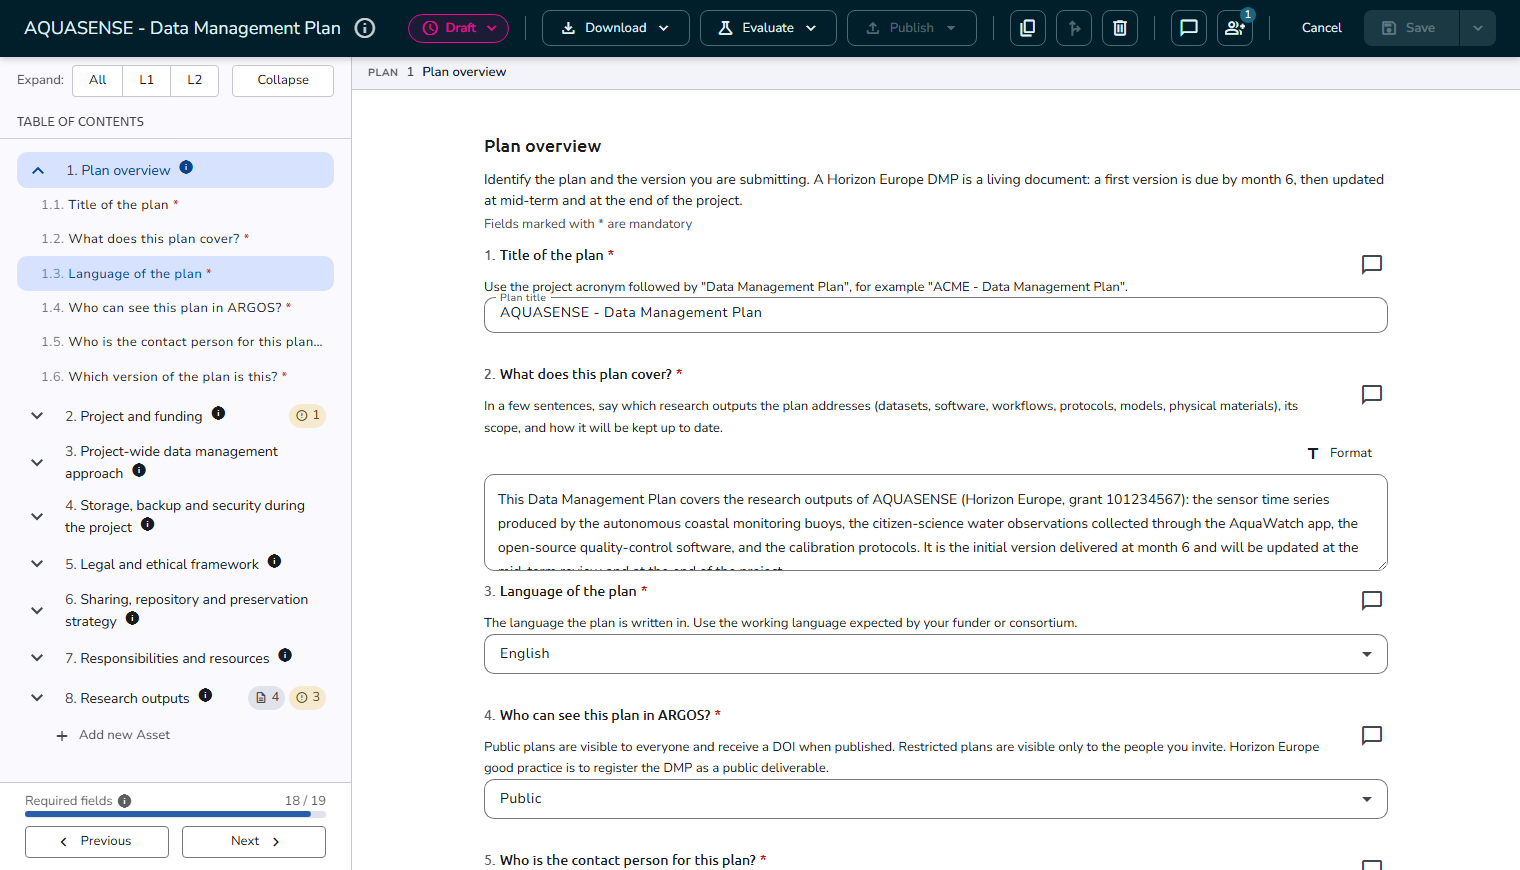 The plan editor
See Fill in a plan for every kind of question, and The plan editor for the toolbar and saving.
Step 4: add assets
Assets describe your research outputs, one per output: a dataset, a piece of software, a protocol, and so on. In a section that accepts assets, click Add new Asset, choose Fill in myself (or import the details from a published record, or copy an existing asset), choose a template, and name the asset. Then answer its questions the same way as the plan's, and save.
See Create or edit an asset and Prefill an asset.
Step 5: invite your collaborators
Click the Collaborators button in the toolbar, then Share. Pick someone you have worked with before, or enter an email address, choose a role (for example Editor for a section of the plan, or Reviewer to comment), and click Send invite. Do this before you finalize: a finalized plan's collaborator list cannot change.
See Work together and Comments and review.
Step 6: check and finalize the plan
When the Required fields counter is complete, decide who should see the plan: set its Access to Public to share it on Public Plans once finalized, or keep it Restricted Access (see Who can see your plan). If your organisation offers evaluators, Evaluate checks the plan against a standard (see Evaluate a plan or asset).
Then save, click the status pill at the start of the toolbar, and choose the finalized status. The Finalise this item? dialog lists anything still missing, with Fix fields to jump there, and asks which draft assets to finalize with the plan. Draft assets you leave out are removed from the plan. Click Finalise plan to confirm.
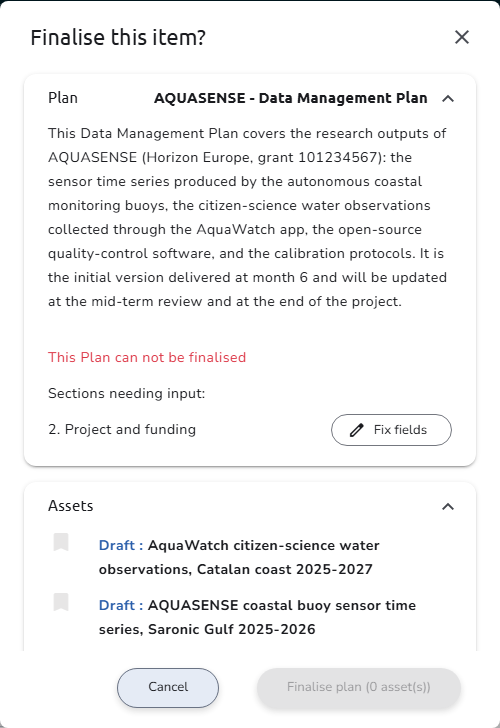 The Finalise this item? dialog
See Change status and finalize a plan.
Step 7: download the plan
Click Download in the toolbar, or in the ... menu of the Plan overview, and choose a format: PDF to send to a funder, Document to keep editing in Word, or a machine-actionable format. See Download a plan or asset.
Step 8: publish the plan (optional)
To get a DOI, click Publish on the finalized plan, choose a repository such as Zenodo and the account to publish under, review what will be sent, and click Publish. See Publish a plan.
Next steps
- Find your plans again on My Plans; a card opens the plan's overview.
- Keep the plan current: start a new version at each milestone, and compare versions to see what changed.
- Something not working? See Troubleshooting for users, or open the Support menu in the top bar.