Import a plan
You can import an existing plan so that you do not have to start from scratch. Click New Plan; on the Select Blueprint step that follows, the Import Plan card is offered at the top of the How would you like to get started? panel, above the blueprint search and list. The card carries an upload icon and the hint Upload an existing plan file; the divider or start fresh separates it from the blueprints. Selecting it opens the Import Plan side panel (Upload an existing file), where you can drag and drop your file onto the upload area or click Upload File to browse for it.
Supported formats
The formats you can import depend on how your installation is set up, so the list you see may differ from the examples below. The Supported File Formats box at the top of the panel summarizes the accepted formats, and the Import Instructions at the bottom explain what each format must contain.
| Format | Description |
|---|---|
| XML | OpenCDMP's native export format. Contains all plan and asset data including blueprint structure. |
| JSON (RDA maDMP) | Machine-actionable DMP format following the RDA DMP Common Standard. Requires additional mapping during import. |
| JSON (RAiD) | RAiD project metadata format. Requires additional mapping during import. |
Import an XML file
XML import needs no mapping: the file already contains all structural information.
- Click New Plan, then click Import Plan at the top of the Select Blueprint step.
- Drag and drop your XML file onto the upload area, or click Upload File to browse for it.
- Optionally edit the Name of the plan (defaults to the file name).
- Click Import. A confirmation (Plan import was successful) is shown and the imported plan opens in the plan editor, where you can review and modify its content.
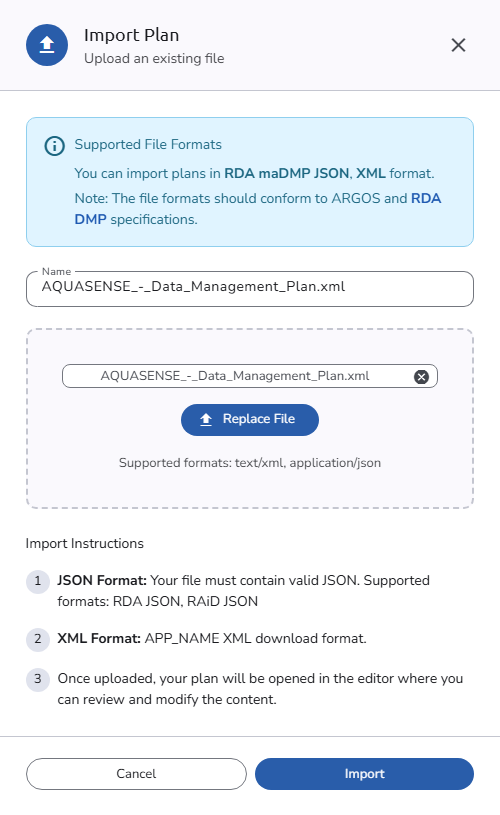 Import plan from XML file
A plan exported from another installation can hold answers that point to plans or assets of that installation, in questions that link to internal plans or assets. If such a plan or asset does not exist in this installation, the import fails with A field refers to a plan that does not exist in this installation (id: ...). Remove that value. (or the same message for an asset). Remove that value from the file and import it again.
Import a JSON file
JSON formats (RDA maDMP, RAiD) do not include blueprint or template information, so an additional mapping step is required.
- Click New Plan, then click Import Plan at the top of the Select Blueprint step.
- Drag and drop your JSON file onto the upload area, or click Upload File to browse for it. You can click Replace File afterwards to pick a different file.
- If your installation offers several JSON formats, select the schema that matches your file from the Select the schema that your json file provides dropdown (for example RDA JSON or RAiD JSON).
- The platform analyzes the file (Analyzing file). An RDA JSON file yields its datasets as assets; a RAiD JSON file describes a project only, so it yields no assets.
- A mapping form appears. Once you select a blueprint, each asset found in the file is listed by name with its own fields. For a RAiD file the form asks only for the plan title and the blueprint, and the imported plan starts without assets: add them in the plan editor afterwards.
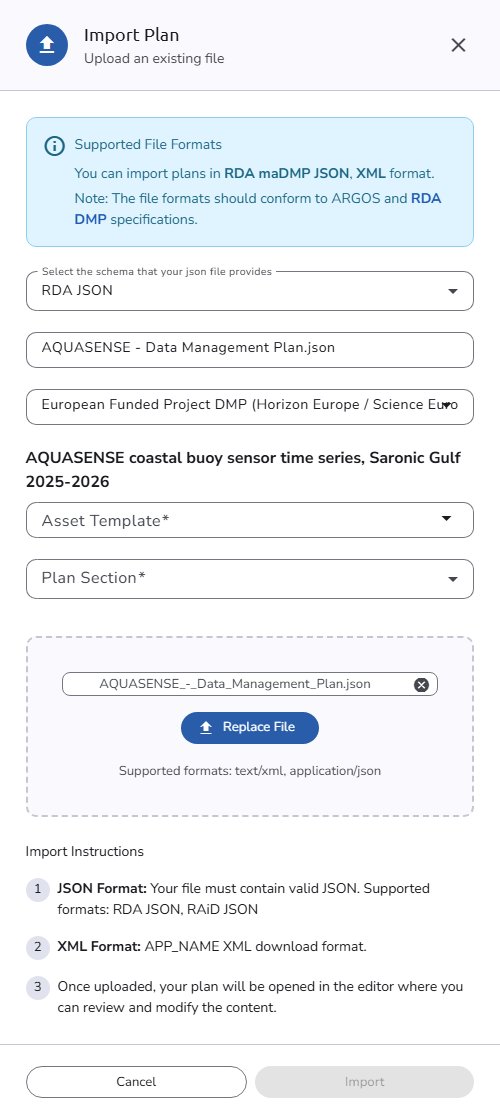 Import plan from JSON file
Complete the mapping form
| Field | Description |
|---|---|
| Plan title | The title for the imported plan. Pre-filled with the plan title of an RDA JSON file, or with the file name of a RAiD JSON file. |
| Select Plan Blueprint | The blueprint that defines the structure of the plan. Select the blueprint that best matches your plan's content. |
| Asset Template (per asset, RDA JSON only) | The asset template to use for each asset found in the file. Click the eye icon to preview a template before selecting it. |
| Plan Section (per asset, RDA JSON only) | The section of the selected blueprint where the asset will be placed. Only sections that accept asset templates are shown. |
All fields are required. Once complete, click Import. The imported plan opens in the plan editor when the import finishes.
Assets cannot be imported on their own: they are always imported together with their plan, and then appear in the plan and on the My Assets page.
If the blueprint asks for consent, you accept it before you can edit the imported plan (see Plan creation consent).