Create or edit an asset
Create an asset
Assets are always created inside a plan:
- Edit a plan by clicking Add new Asset next to Linked Assets in a specific section, or under that section in the table of contents.
You can add an asset only in sections that have an asset template assigned. Add new Asset is disabled, with a tooltip explaining why, when the section already holds the maximum number of assets its templates allow, or when you still have unsaved plan changes to save first.
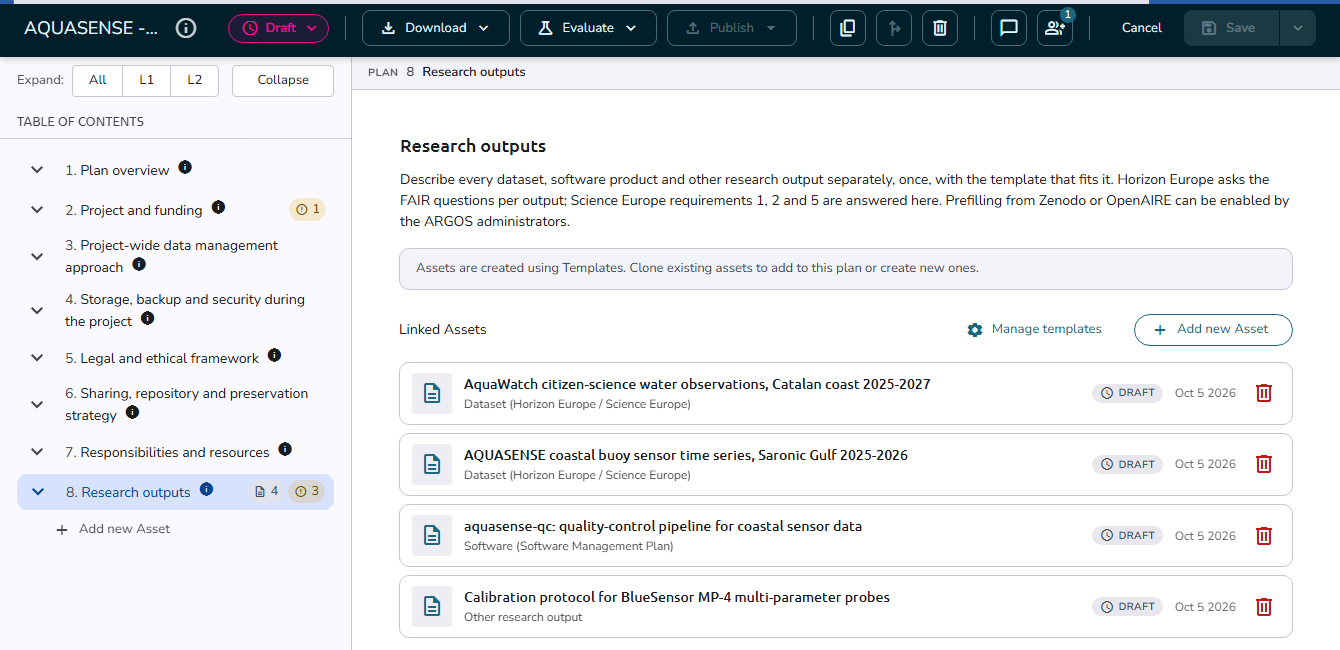 Plan editor
You can also click New Asset under My Assets in the side navigation menu. The Select a Plan for your Asset dialog asks for the plan in which the asset will be stored. After you select a plan and press Next, the plan editor opens for that plan; go to the section the asset belongs to and click Add new Asset.
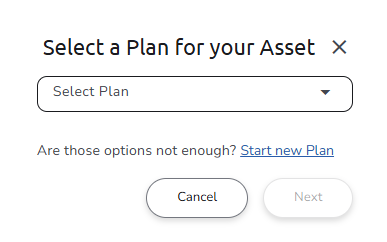 New Asset from the side navigation menu
Clicking Add new Asset opens the Add a new asset panel, a step-by-step wizard. An information button next to the panel title answers What is an asset? with a short explanation if you need it. Each step after the first shows a Back link, and a Step X of Y indicator tracks your progress; the total number of steps adapts to the path you choose (three steps for filling in or importing, two steps for copying).
Step 1: choose how to fill in the asset
The first step asks How would you like to fill in this asset? and offers up to three approach cards:
- Fill in myself: start with an empty form. This option is always available and is marked Most common.
- Import from a published resource: pull details from Zenodo, DataCite, OpenAIRE, or other repositories. Shown only when the section's blueprint enables prefilling sources (see Prefill an asset).
- Copy from an existing asset: use a previous asset as a starting point. Shown only if you have permission to clone assets.
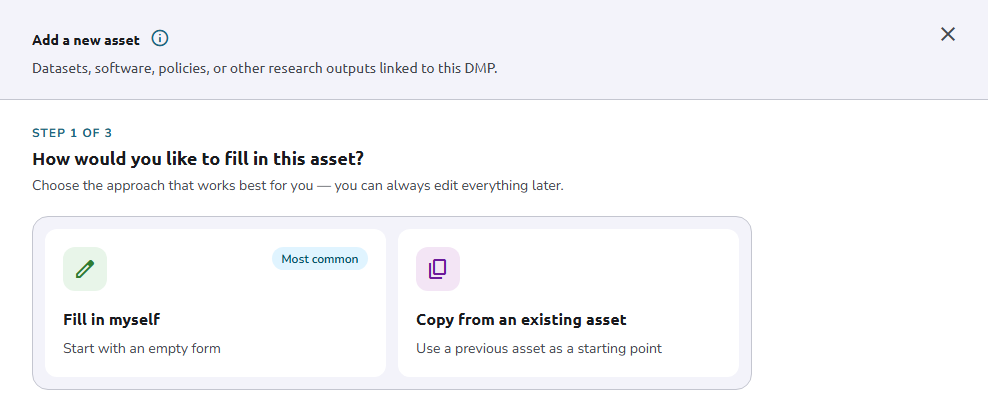
Selecting Copy from an existing asset expands the list of candidate assets inline on the same step (see Copy an existing asset below), so that path needs only one more step: naming the asset. Fill in myself and Import from a published resource continue to a second step first.
Start from a template
Choosing Fill in myself moves to Choose a template, which lists the templates linked to the section as rows. Each row shows the template's icon, its asset type as a colored chip, its name and description, and the number of fields it contains. For any template you can:
- Press Overview to open its details in a side panel: the Sections and Fields counts, an About text, and the Template structure with its sections and subsections. The side panel has its own Use this template button.
- Press Use this to select the template and continue directly to naming the asset.
A template is disabled, with a tooltip explaining why, once the section holds the maximum number of assets allowed for it.
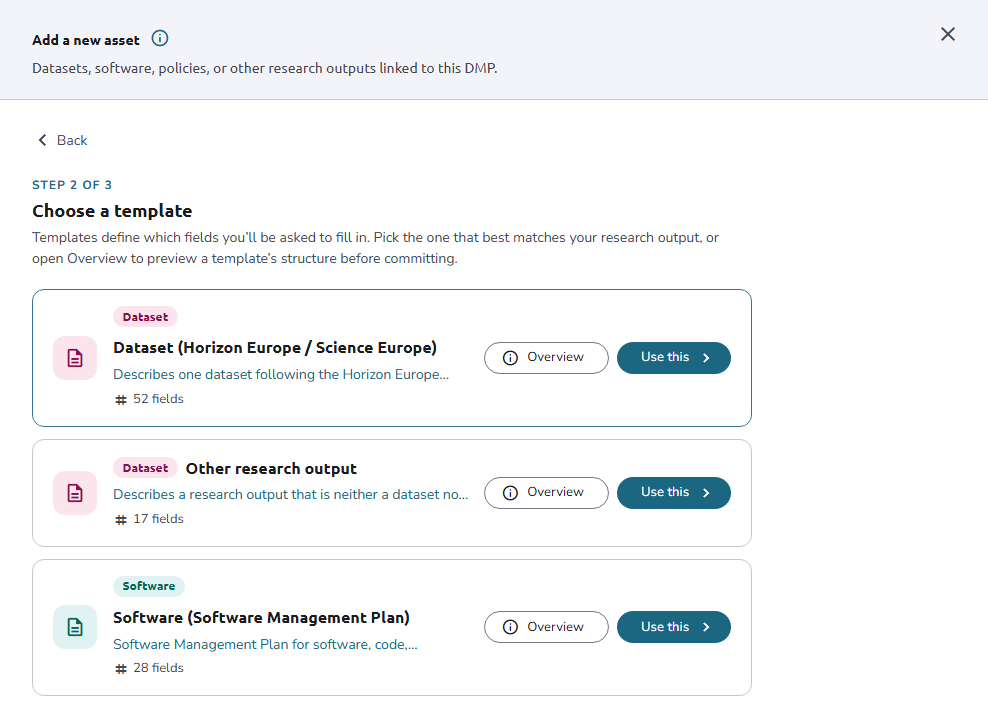
If the section has no templates linked yet, the step explains what to do next depending on your role in the plan:
- Plan owners who can edit the section's template list see No recommended templates available. together with a link to view the section in the plan editor, where they can attach a template. Following the link closes the panel and takes you back to that section.
- Other contributors see There are no templates linked to this section. and are asked to contact an owner of the plan to add a template first.
See Manage a section's templates below for how owners curate the linked templates.
Import from a published resource
Choosing Import from a published resource moves to Import from a published source, where you:
- Choose the Template the imported metadata will map onto. The template decides which fields the imported metadata can fill in, and it is pre-selected automatically when the section has only one linked template that can still be used.
- Choose a Data source: the external repository to search. The sources offered depend on the plan's blueprint: if the section names specific prefilling sources, only those are listed; otherwise every active prefilling source of your organisation is available. A single source is pre-selected automatically.
- Enter an Identifier or title: paste the identifier used by the selected data source, or search by title. Then press Look up. The button stays disabled until you type something.
Matching records are listed with the selected template's type chip, the record's title, its type, its identifier, and the confirmation Metadata retrieved — fields will be pre-filled where available. Press Import next to a record to pull its data into your asset and continue to naming it. If nothing matches, the panel tells you that no records match your search term.
If the section enables prefilling but no active source is available, the step shows No data sources are enabled for this section. Contact your administrator, who manages prefilling sources.
For more on how imported fields are matched to template questions, see Blueprint and Prefill an asset.
Copy an existing asset
Choosing Copy from an existing asset on step 1 expands Choose an asset to copy on the same step. If you have permission to clone both your own and public assets, a toggle lets you switch between My assets and Public assets; otherwise only the list you are allowed to copy from is shown. Search or scroll the list. Each row shows the asset's name, its type chip, the template it uses, and when it was last updated. Only assets whose template is linked to the current section are listed. An asset is shown disabled, with a tooltip explaining why, when its template is not linked to the section or when the section already holds the maximum number of assets for that template. Press Load more if the list does not show every match yet.
Press an asset's row to copy it into the panel and continue to naming the asset, pre-filled with its template structure and completed field values.
If no asset matches, the panel shows No compatible assets found. (or No assets match "..." when you searched). If the section has no templates linked at all, you get the same role-specific guidance as on the template step: owners are pointed to the section in the plan editor to attach a template, contributors are asked to contact an owner of the plan.
Name your asset
Every path ends on Name your asset. Set the Name (required) and, optionally, a rich-text Description (optional), then press Continue — fill in details. The new asset opens in the editor, and it is stored when you save with Save.
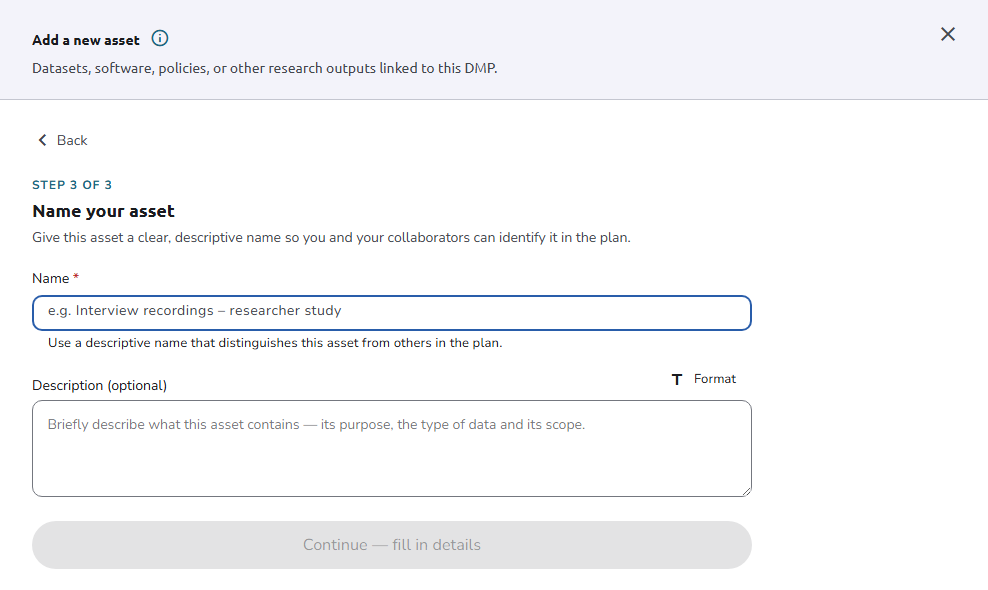
- Coming from Import, a banner reads Imported from source with the imported record's title, and the hint confirms that the name and description were pre-filled from the imported record.
- Coming from Copy, a banner reads Copied from asset with the source template's name, and the hint confirms that the name and description were copied from the source asset.
In both cases you can still review and edit the name and description before continuing. After the asset is created, it takes the status configured for your organisation, according to the asset workflow.
After creating the asset you cannot change the selected asset template.
Manage a section's templates
Where the blueprint allows editing the asset template list, owners of a section can choose which templates the section offers, separately from creating an asset. Press Manage templates next to Add new Asset to open the Manage templates dialog, which lists the templates currently linked to the section:
- Templates that come from the blueprint are marked From the blueprint and cannot be removed.
- Templates added specifically to this plan are marked Added to this plan and can be removed, unless an asset already uses that template, in which case the remove button is disabled with a tooltip.
Press Add template to browse all available asset templates for your section's type, review a template's details, and add it to the list. Press Save to save your changes to the section, or Cancel to discard them.
Contributors can create assets only from the templates linked to the section. The same templates determine which existing assets can be copied into the section.
Navigate the asset editor
The asset editor shares the same layout as the plan editor:
- The context band above the form says what is open: the asset, its number in the plan, and its status. A delete button at its right end removes the asset. The plan sections stay one click away in the table of contents.
- The table of contents lists the asset's sections under the plan section it belongs to. Click a section to jump to it; the panel highlights where you are. The asset's own row shows its status and an amber counter of required questions still to complete; expand it to jump to any question.
- Each section is an expansion panel that you can expand or collapse. Sections load as you open them, which keeps large assets responsive.
- Required questions are marked with an asterisk (
*) next to their label. See Fill in a plan for every kind of question. - Rich text questions use a rich text editor. Press Format above the field to show its toolbar for bold, lists, links, and similar formatting, and Plain Text to hide the toolbar again while you write.
- Every question has its own comment thread, opened with the comment icon next to the question. Comments open in a panel beside the form so you can read the answer while discussing it (see Comments and review).
A short guided tour introduces the asset editor the first time you open it.
Edit an asset
While editing, the asset's current status (for example Draft) shows as a button in the context band, right above the form. Clicking it opens a dropdown with the transition statuses available for this asset according to the asset workflow, for example Finalize.
To change an asset's status you must save or discard all editor changes first.
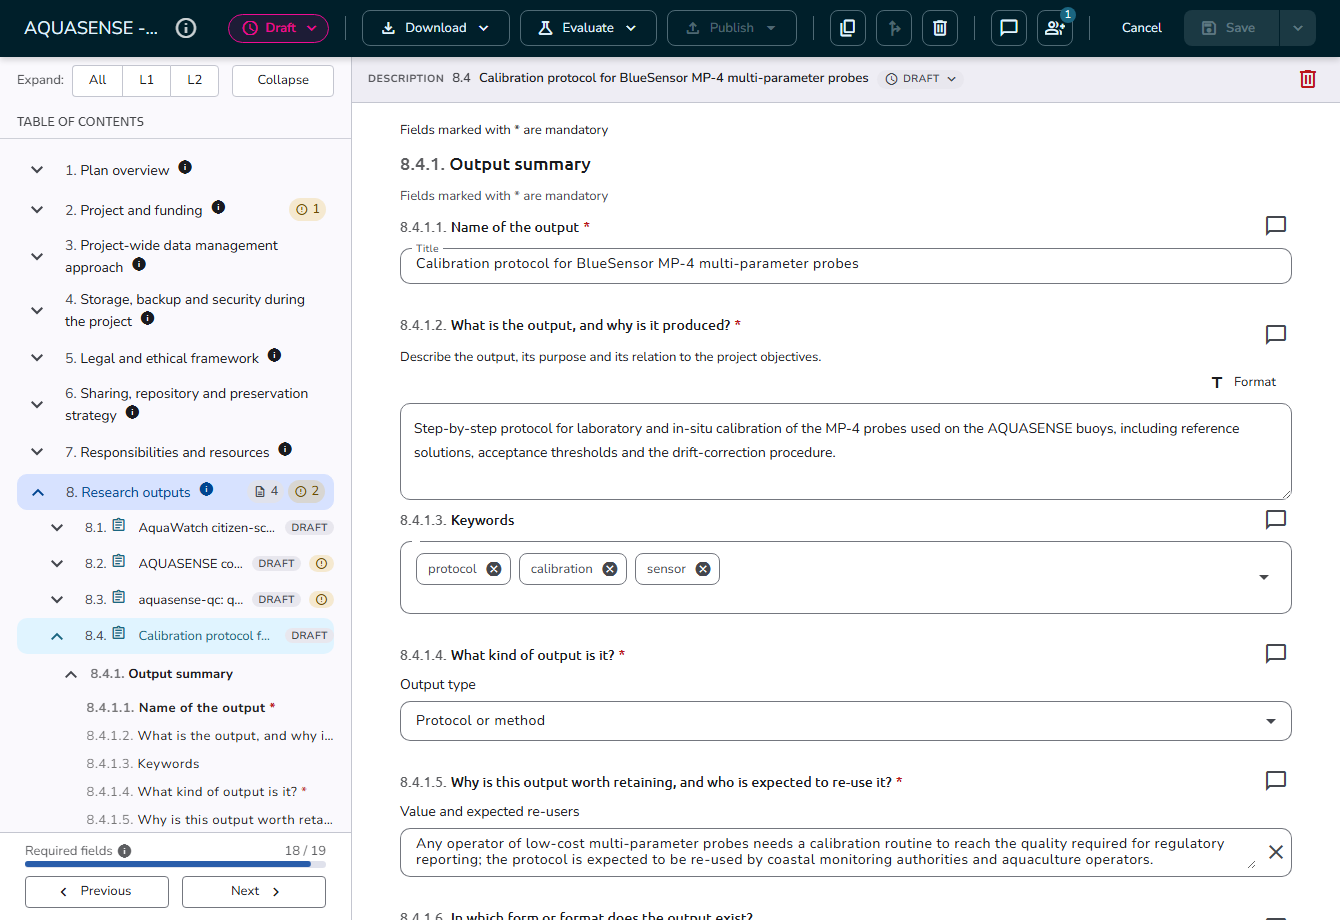
To finalize an asset, you must answer all the required questions. If the asset is not valid for finalization yet, the unanswered required questions are marked red.
The Save button is enabled as soon as something changes. Use its menu to save and keep editing (Save & Continue) or to save and close the editor (Save & Close).
Update to a newer template version
If the template your asset is based on has a newer version published, and the asset is still in a Draft status, the editor prompts you with a dialog asking whether you want to update to the new version. Choose Update to move the asset onto the latest template version, or Cancel to keep working with the current one.
This prompt updates a single asset to the latest version of its own template. Updating a plan to a newer blueprint is a separate flow: create a new version of the plan and choose the newer blueprint.
Work with references in an asset
When editing an asset, some fields require selecting values from predefined lists instead of typing free text. These lists are called References.
If the value you need is not in the available options, you can add it manually. See Adding a reference manually.
Next steps
- Asset overview: view asset details and available actions
- Prefill an asset: use external sources to automatically populate answers
- Download a plan or asset: download your asset as PDF, DOCX, or XML