Getting started
This checklist takes a new organisation from creation to its first published plan. Each step names the page to use and links to its full description. Read How it fits together first: it explains how blueprints, templates, reference types, and plugins depend on each other, which role can do what, and what a new organisation already shares with the Default organisation, so that you do not rebuild what is already there.
All pages below are in the Admin view: switch the toggle at the top of the side navigation menu from User View to Admin. Administering OpenCDMP lists the menu.
1. Create the organisation
A System Administrator or an Installation Manager goes to Installation > Organisations, clicks Create Organisation, and enters the Name, the Code, and the Description. The code appears in the organisation's addresses (/t/<code>/...) and cannot be changed later. See Organisations.
Skip this step if your organisation already exists, or if the installation serves a single organisation from the Default organisation.
2. Appoint the first Organisation Admin
A new organisation is never without an administrator: every System Administrator of the installation becomes its Organisation Admin when it is created, and every Installation Manager becomes a Member. To hand it over to its own administrator, select the new organisation in the organisation menu (the organisation button in the top bar), then either invite the person with the Organisation Admin role from Organisation > Users, or give the role to their existing account. Both ways are described in The first Organisation Admin.
3. Add users and give them roles
In Organisation > Users, click Invite users to invite people by email with their organisation roles; people join the organisation when they accept. To change someone's roles later, click the person and tick them in the drawer. Give Member to everyone who writes plans, and the managing roles only to those who need them; a Template Manager who also writes plans needs Member too. See Users and Roles.
4. Work through the Settings
Organisation > Settings opens on an overview with a card per section. Anything you do not change follows the Default organisation's settings, or the built-in defaults (see what falls back), so change only what your organisation needs. See Organisation settings.
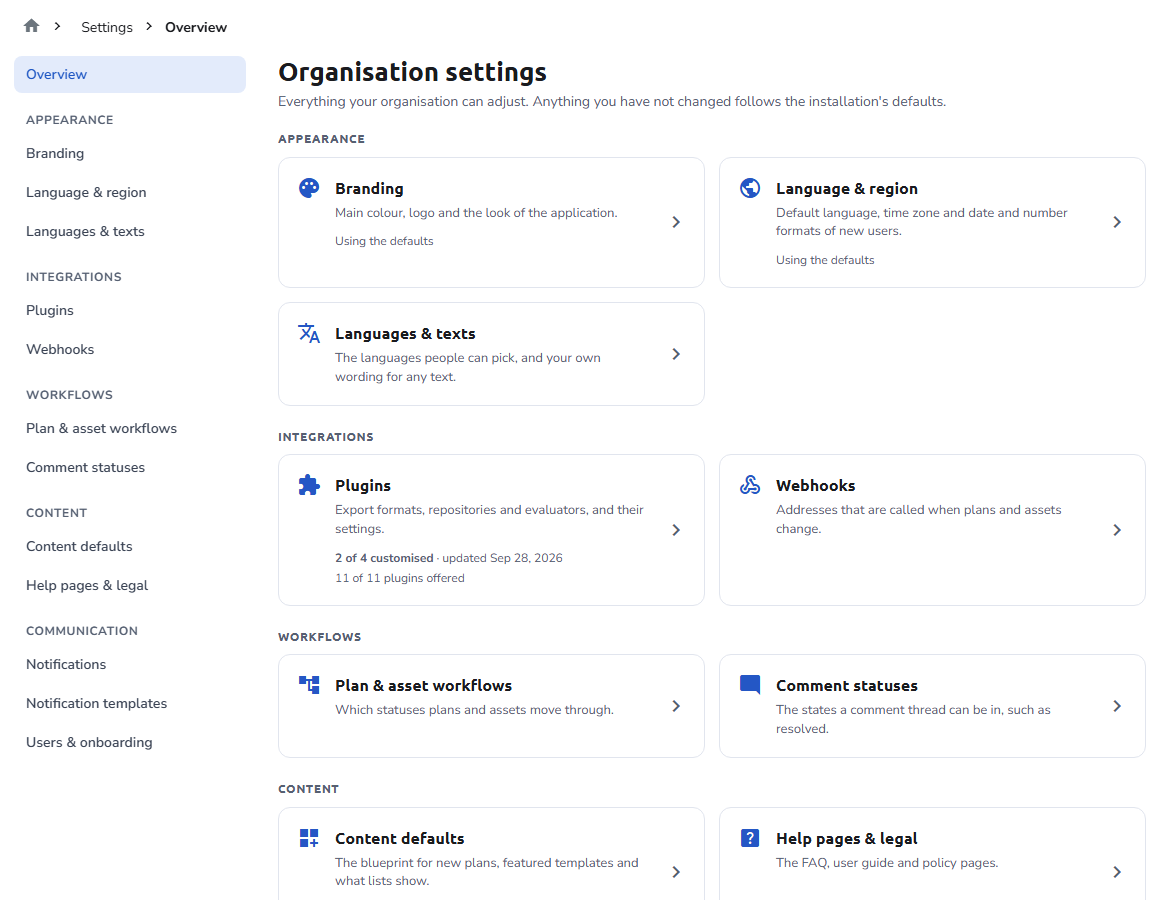
- Branding: the main color and the logo. See Branding.
- Language & region: the default language, timezone, and format of new users. See Language & region.
- Languages & texts: the languages people can pick, and your own wording for any text of the application. See Languages.
- Plugins: which export formats, repositories, and evaluators your users get, and their settings. See Plugins.
- Notifications and Notification templates: the channels each notification uses, and its wording. See Notifications and Notification templates.
- Users & onboarding: the terms and conditions people accept before first use, and the guided tours. Terms are not inherited from the Default organisation: without your own, nobody is asked to accept any. See Users & onboarding.
- Help pages & legal: the About, FAQ, User Guide, and policy pages, if the built-in texts do not suit you. See Help pages & legal.
5. Check the reference types
Reference types are the look-up lists behind questions such as funder, grant, license, or researcher. A new organisation already sees the reference types of the Default organisation, marked Shared by default organisation in Data Sources > Reference Types. Create your own only for sources you are missing, such as an institutional directory. See Reference Types.
6. Build the asset templates
Asset templates hold the questions about each output of a plan, such as a dataset or software. Create them under Templates > Asset Templates, preview them on the Review tab, and finalize them: only finalized templates can be offered in a blueprint. Start from a shared template or copy its sections if one comes close. See Asset Templates.
7. Build the plan blueprints
A blueprint defines the sections of a plan, the questions about the plan as a whole, and which asset templates authors can use in each section. Create it under Templates > Plan Blueprints and finalize it. Then, under Settings > Content defaults, choose the blueprint for new plans and the featured blueprints and templates. See Plan Blueprints and Content defaults.
8. Add prefilling sources (optional)
A prefilling source lets authors start an asset from a record in another system, such as Zenodo. Create it under Data Sources > Prefilling Sources, then switch it on in the blueprint sections that collect assets. Its fill rules reach template questions through semantics. See Prefilling Sources.
9. Set up the workflows
Under Settings > Plan & asset workflows, check the statuses plans and assets move through, who may move work into each status, and what people can do in it: Publish, Download, and Evaluate. Until you save your own, the organisation follows the Default organisation's workflows. See Plan & asset workflows.
10. Test with a plan
Sign in as a Member, or ask one to help, and go through a plan from start to end: create it from your blueprint, add an asset to each section, invite a collaborator, change its status, download it, and finalize it. Check that the expected notifications arrive; the Notification Log shows what was sent. The user's side is described in Your first plan.
11. Set up publishing
To let users publish plans to a repository such as Zenodo and get a DOI, follow Set up publishing to a repository.
After launch
- Research Insights counts how questions were answered across the organisation.
- Webhooks tell other systems when plans are finalized, change status, or are published.
- Data Transfer copies a configured organisation to another organisation or installation.
- A new version of a finalized blueprint or template is made with New Version from its row menu; plans and assets already started keep the version they began with.